
Sheet To Table Live Sync From Google Sheet: To sync Google Sheets with a live table, use Google Sheets API or third-party tools like Sheetgo. These methods ensure real-time data updates.
Syncing Google Sheets with live tables enhances data management efficiency. The Google Sheets API provides seamless integration, allowing for real-time data updates and synchronization across various platforms. Third-party tools like Sheetgo simplify the process, offering user-friendly interfaces and robust functionalities.
This live sync feature is crucial for businesses requiring up-to-the-minute data accuracy. It eliminates manual data entry, reducing errors and saving time. With these tools, users can automate workflows, ensuring that their data is always current and reliable. This is particularly beneficial for dynamic environments where data changes frequently, such as sales tracking, inventory management, or financial reporting. Syncing Google Sheets with live tables ultimately streamlines operations and boosts productivity.

Credit: www.youtube.com
Introduction To Live Sync
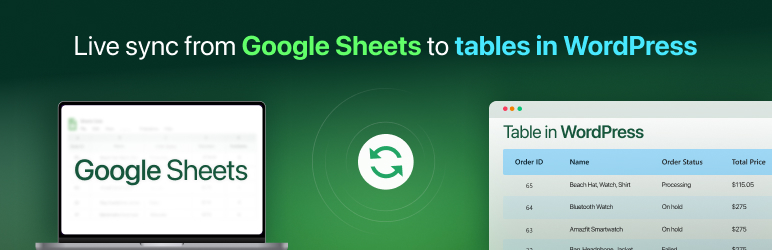
Welcome to the world of Live Sync! Imagine a place where your Google Sheets data updates automatically in real-time. This is not a dream; it’s Live Sync. It transforms how you manage and display data.
What Is Live Sync?
Live Sync is a feature that keeps your Google Sheets data updated in real-time. Any changes made in the sheet reflect instantly on your connected tables. This eliminates the need for manual updates.
Here are some key features of Live Sync:
- Automatic data updates
- Real-time synchronization
- Increased accuracy and efficiency
Importance In Modern Workflows
In today’s fast-paced world, Live Sync is vital. It ensures your data is always up-to-date. This is crucial for decision-making and analysis.
Consider these benefits:
| Benefit | Description |
|---|---|
| Time-Saving | No manual updates needed. |
| Accuracy | Reduces human errors. |
| Efficiency | Streamlines workflows. |
Live Sync helps teams work smarter. They can focus on what truly matters.
Setting Up Google Sheets
Setting up Google Sheets is easy and quick. Follow the steps to start using Google Sheets efficiently.
Creating A New Sheet
To create a new sheet, open Google Sheets on your browser. Click on the Blank option to start a new sheet.
You can also choose from various templates. These templates can save time and provide a structured format.
To rename your sheet, click on the default name at the top left. Enter your desired name and press Enter.
Basic Formatting Tips
Formatting your sheet makes data easy to read. Use these tips for basic formatting:
- Bold: Select the cells you want to bold. Click the B icon.
- Italics: Select the cells. Click the I icon.
- Underline: Select the cells. Click the U icon.
- Text Color: Select the cells. Click the text color icon (A) and choose your color.
- Background Color: Select the cells. Click the fill color icon (paint bucket) and choose your color.
You can also format numbers. Click on the 123 icon to format as currency, percentage, or date.
Here is an example of a basic table:
| Item | Price | Quantity |
|---|---|---|
| Apples | $1.00 | 10 |
| Oranges | $0.80 | 15 |
Using these tips will help you create clear and readable sheets. Practice these steps to become efficient in using Google Sheets.
Connecting Google Sheets To Database
Connecting Google Sheets to a database can save you time and effort. It helps in automating data transfers and ensures real-time updates. Learn how to connect Google Sheets to a database for live sync.
Required Tools And Plugins
To connect Google Sheets to a database, you need specific tools. Here’s a list of required tools:
- Google Sheets: The primary tool for managing data.
- Database: MySQL, PostgreSQL, or any other compatible database.
- API Connector: A plugin to connect Google Sheets with databases.
Step-by-step Connection Guide
Follow these steps to connect Google Sheets to your database:
- Install API Connector: Open Google Sheets and install the API Connector plugin.
- Open Plugin: Launch the API Connector from the Google Sheets Add-ons menu.
- Set Up Database: Ensure your database is accessible via API.
- Create API Request: In API Connector, create a new API request.
- Enter API URL: Provide the API URL for your database.
- Authentication: Enter any required authentication details.
- Test Connection: Run a test to ensure the connection works.
- Save Request: Save your API request for future use.
- Automate Sync: Schedule automatic syncs to keep data updated.
Connecting Google Sheets to a database has many benefits. It ensures real-time data updates and saves manual effort.
Automating Data Sync
Automating data sync from Google Sheets to tables can save time. It ensures data accuracy and efficiency. By automating, you can eliminate manual updates. This enhances productivity and reduces errors.
Scheduling Updates
Scheduling updates helps in maintaining up-to-date data. You can set specific times for updates. This ensures your data is always current.
Use a scheduling tool to automate these tasks. Here are steps to schedule updates:
- Open your scheduling tool.
- Set the time for updates.
- Choose the Google Sheet to sync.
- Save the schedule.
These steps help ensure your data stays fresh.
Real-time Sync Options
Real-time sync keeps your data updated instantly. This is ideal for dynamic environments. To enable real-time sync, follow these steps:
- Open your sync tool.
- Connect it to Google Sheets.
- Enable real-time sync.
- Save the settings.
Real-time sync ensures data accuracy at all times.
Here is a comparison between scheduling updates and real-time sync:
| Feature | Scheduling Updates | Real-Time Sync |
|---|---|---|
| Update Frequency | At scheduled times | Instantly |
| Best For | Less dynamic data | Highly dynamic data |
| Setup Complexity | Moderate | High |
Choose the sync method that fits your needs best.
Customizing Data Presentation
Customizing data presentation is crucial for effective decision-making. Using Google Sheets’ live sync, you can transform raw data into insightful information. This helps in creating more engaging and actionable reports. Let’s explore how you can leverage formulas and visual dashboards to enhance your data presentation.
Using Formulas For Data Transformation
Formulas can significantly alter the way data is presented. They help you clean, organize, and summarize data. For example, you can use the =SUM() formula to calculate totals, or the =AVERAGE() formula to find averages. These formulas make data easier to understand.
Using conditional formatting, you can highlight important data points. For instance, you can highlight cells that meet certain criteria, making key information stand out. This improves readability and comprehension.
Additionally, you can use text functions like =CONCATENATE() to combine text from different cells. This is useful for creating unique identifiers or merging data fields. The =VLOOKUP() function helps in retrieving data from different sheets, making it easier to cross-reference information.
Creating Visual Dashboards
Visual dashboards provide a snapshot of key metrics. They help in quick decision-making. Using charts, graphs, and tables, you can present data more intuitively. Google Sheets offers various chart types, such as bar, line, and pie charts.
To create a visual dashboard, start by identifying the key metrics. Use the Chart Editor tool to select the appropriate chart type. Customize the chart with labels, titles, and colors to make it more informative.
You can also use pivot tables for a more detailed data analysis. Pivot tables summarize large data sets, making it easier to spot trends and patterns. They allow you to filter and sort data based on different criteria.
| Feature | Description |
|---|---|
| Formulas | Transform raw data with calculations and text manipulations. |
| Conditional Formatting | Highlight cells based on specific conditions. |
| Charts | Visualize data with different chart types. |
| Pivot Tables | Summarize large data sets for detailed analysis. |
Using these tools, you can create a dynamic and interactive data presentation. This helps in better understanding and quick decision-making.
Credit: wordpress.org
Ensuring Data Security
Data security is crucial for Sheet To Table Live Sync from Google Sheet. Protecting sensitive information ensures your data remains safe and trustworthy. Let’s explore effective ways to ensure data security through access control and encryption techniques.
Access Control Best Practices
Access control helps regulate who can view or use your data. Implementing strict access control practices is essential for data security. Here are some best practices:
- Use strong, unique passwords for every user.
- Enable two-factor authentication (2FA).
- Grant access based on roles and responsibilities.
- Regularly review and update user permissions.
- Monitor access logs for any suspicious activities.
Data Encryption Techniques
Data encryption converts your data into a secure format. Only authorized users can decrypt and access it. Here are some effective encryption techniques:
- SSL/TLS Encryption: Secures data during transmission.
- End-to-End Encryption: Encrypts data from source to destination.
- Database Encryption: Encrypts data stored in databases.
- File-Level Encryption: Encrypts individual files for added security.
Implementing these techniques ensures your data remains protected and secure.
Troubleshooting Common Issues
Using Sheet To Table Live Sync From Google Sheet can simplify data management. But sometimes, problems arise. This guide helps you solve the most common issues. Let’s dive into connection problems and data inconsistencies.
Connection Problems
Connection issues can disrupt your workflow. Here are steps to troubleshoot:
- Check your internet connection. Ensure it’s stable.
- Verify your Google Sheet URL. Make sure it’s correct.
- Ensure you have the right permissions. You need edit access.
- Clear your browser cache. Sometimes, old data causes problems.
- Try a different browser. Some browsers work better than others.
If these steps don’t help, you might need to reauthenticate your Google account. Follow these simple steps:
- Go to your account settings.
- Find the connected apps section.
- Revoke access for the application.
- Reauthorize the application.
Data Inconsistencies
Data inconsistencies can cause confusion. Ensure the accuracy of your data with these tips:
| Issue | Solution |
|---|---|
| Outdated Data | Refresh the sync. Ensure real-time updates. |
| Incorrect Formatting | Check data types. Ensure they match the table format. |
| Missing Data | Verify all rows and columns are included. Check for hidden cells. |
| Duplicate Entries | Use a filter or remove duplicates manually. |
Regularly check your data for these issues. It ensures smooth operation.
By following these steps, you can resolve most problems quickly. Keep your data synced and accurate with minimal effort.
Maximizing Productivity Gains
In today’s fast-paced world, efficiency is key. Using Sheet To Table Live Sync From Google Sheet can boost productivity. This tool helps streamline workflows and saves time. Let’s explore how to maximize these productivity gains.
Case Studies
Real-world examples show the power of this tool. Many businesses have seen success using it. Here are a few noteworthy cases:
| Company | Problem | Solution | Outcome |
|---|---|---|---|
| Tech Innovators | Manual data updates | Live Sync | 50% time saved |
| Market Analysts | Data inaccuracies | Automated Sync | Accuracy improved by 70% |
| Retail Giants | Slow reporting | Real-time updates | Reports generated 2x faster |
Tips And Tricks
Maximize your gains with these practical tips:
- Automate Tasks: Use scripts for automatic updates.
- Collaborate: Share sheets with team members.
- Integrate: Combine with other tools like CRM.
Follow these steps to set up live sync:
- Open your Google Sheet.
- Install the necessary add-ons.
- Configure sync settings.
- Test the sync to ensure accuracy.
These simple steps can make a huge difference. Keep your data live and accurate.
Frequently Asked Questions
How Do I Sync Data From One Sheet To Another In Google Sheets?
Use the IMPORTRANGE function to sync data. Type =IMPORTRANGE(“spreadsheet_url”, “Sheet1!A1:D10”) in the destination sheet. Replace “spreadsheet_url” with your source sheet URL. Adjust the range as needed.
How Do I Match Data From One Sheet To Another In Google Sheets?
Use the VLOOKUP function to match data between sheets. Enter =VLOOKUP(search_key, range, index, FALSE). Ensure the range includes the data you want to match.
How Do I Use Real Time Sync Between Excel And Google Sheets?
Use tools like Sheetgo or Zapier to sync Excel and Google Sheets in real time. Configure the integration, and updates will sync automatically.
How Do I Link Live Data In Google Sheets?
Use the IMPORTDATA, IMPORTXML, or IMPORTHTML functions in Google Sheets. These functions pull live data from external sources. Ensure the URL is public and accessible.
What Is Sheet To Table Live Sync?
Sheet to Table live sync connects Google Sheets data to databases, ensuring real-time updates and consistency.
Conclusion
Syncing Google Sheets to your table offers real-time updates and improved efficiency. It simplifies data management and decision-making. Adopting this live sync feature can streamline your workflow, making your tasks more manageable. Embrace this tool for a smoother, more productive experience in handling your data.

