How To Delete WordPress Site HostGator: To delete your WordPress site on HostGator, access your cPanel and remove the WordPress installation. This process involves deleting files and databases.
Deleting a WordPress site on HostGator is a straightforward task. Start by logging into your HostGator cPanel account. From there, navigate to the “Software” section and click on “QuickInstall” or “Softaculous Apps Installer. ” Find your WordPress installation and choose the delete option.
This will remove the WordPress files. Next, go to the “Databases” section in cPanel and select “MySQL Databases. ” Delete the database associated with your WordPress site. Ensure all files are removed from the “File Manager” under the “public_html” directory. This ensures your site is completely deleted. Always back up your site before performing deletions to avoid data loss.
Preparation Steps
Deleting your WordPress site on Hostgator requires careful preparation. Following these preparation steps ensures a smooth process.
Backup Your Data
Before deleting your site, create a backup. This ensures you don’t lose important data. Follow these steps:
- Log in to your WordPress dashboard.
- Navigate to Tools > Export.
- Select All Content and click Download Export File.
- Save the file to your computer.
Additionally, backup your database and files using Hostgator’s cPanel:
- Log in to your Hostgator cPanel.
- Go to Files > Backup Wizard.
- Click Backup, then select Full Backup.
- Download the backup file once generated.
Inform Stakeholders
Informing stakeholders is a crucial step. Ensure everyone involved is aware of the site’s deletion.
- Notify team members about the upcoming changes.
- Update clients and users via email or notifications.
- Document the process and share it with relevant parties.
This avoids confusion and keeps everyone in the loop.
Accessing Hostgator
Deleting your WordPress site on HostGator is easy. First, you need to access your HostGator account. This guide will help you through the steps. It’s simple and quick. Let’s get started.
Log Into Hostgator Account
Go to the HostGator login page. Enter your username and password. Click the “Login” button. You will be directed to your account dashboard. This is where you manage your hosting services.
Navigate To Dashboard
Once logged in, find the “Dashboard” tab. This is usually at the top of the page. Click on it to access the main dashboard. Here, you can see all your websites and domains.
In the dashboard, look for the “Hosting” section. This section contains all your hosting details. Click on the “Manage” button next to your WordPress site. This will take you to the management page.
On the management page, find the “Settings” tab. Click on it to access your site settings. Here, you can delete your WordPress site. Follow the prompts to complete the deletion process.
If you face any issues, contact HostGator support. They are available 24/7 to assist you. Deleting your WordPress site is now complete. Make sure you have backed up any important data.
Locating Your WordPress Site
Deleting a WordPress site on HostGator starts with finding your site. Locating your WordPress site is simple if you follow the right steps. This section will guide you on how to find your domain and select your WordPress installation.
Find Your Domain
First, log in to your HostGator control panel. Look for the Domains section. You will see a list of all your domains here.
- Navigate to the cPanel from your HostGator dashboard.
- Find the Domains tab and click on it.
- Locate your domain from the list provided.
Make sure to identify the correct domain linked to your WordPress site. This step is crucial to avoid deleting the wrong site.
Select The WordPress Installation
Once you have found your domain, the next step is to select your WordPress installation. This involves accessing the Softaculous Apps Installer in the cPanel.
- Go back to the cPanel home page.
- Scroll down to the Software section.
- Click on Softaculous Apps Installer.
- In the Softaculous dashboard, select WordPress.
- Find your WordPress installation from the list of installed applications.
Click on the WordPress installation associated with your domain. You will see options to manage or delete your installation.
By following these steps, you will easily locate your WordPress site on HostGator. This ensures you are ready to proceed with the deletion process.
Using Cpanel
Deleting a WordPress site on HostGator using cPanel is a straightforward process. It allows you to manage your website’s backend with ease. Follow these steps to remove your WordPress site efficiently.
Open Cpanel
First, log in to your HostGator account. Once logged in, navigate to your hosting dashboard. Look for the cPanel option and click on it. This will open the cPanel interface where you can manage your website files and databases.
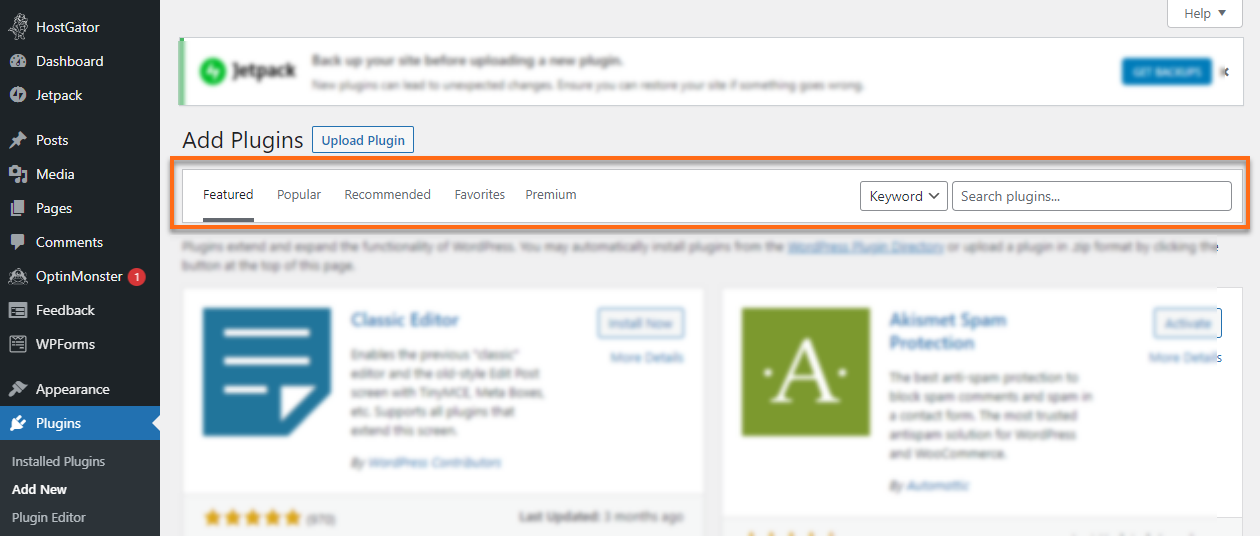
Locate WordPress Tools
Inside the cPanel, find the WordPress Tools section. It might be under a category like ‘Software’ or ‘Applications’. Look for icons or links named WordPress Manager or WordPress Installer.
| Step | Action |
|---|---|
| 1 | Log in to HostGator |
| 2 | Open cPanel |
| 3 | Find WordPress Tools |
Once you locate the WordPress Tools, click on the WordPress Manager. Select the site you want to delete. Click on the Delete button to remove the site. Confirm the deletion if prompted.
Uninstalling WordPress
Uninstalling WordPress from your HostGator account can be a quick process. This guide will walk you through the steps to uninstall WordPress using Softaculous. Follow these instructions to remove your WordPress site easily and effectively.
Open Softaculous
First, log in to your HostGator cPanel account. Look for the Softaculous Apps Installer icon, usually found under the “Software” section. Click on it to open the Softaculous dashboard.
On the Softaculous dashboard, you will see a list of installed scripts. Find WordPress in the list. Click on the WordPress icon to proceed to the next step.
Remove Installation
Once you are on the WordPress management page, look for the All Installations tab at the top. Click on it to view all your WordPress installations.
Identify the WordPress site you want to remove. Click on the Remove icon (a red ‘X’) next to the installation.
A confirmation message will appear asking if you are sure you want to delete the installation. Click Remove Installation to confirm.
The system will now remove all files, databases, and user data associated with this WordPress installation. This process might take a few moments. Once completed, you will see a success message.
That’s it! You have successfully uninstalled WordPress from your HostGator account using Softaculous.
Credit: www.hostgator.com
Deleting Files
Deleting files is a crucial step when you want to delete your WordPress site on HostGator. It ensures that all your data, themes, and plugins are permanently removed. This guide will walk you through the process of accessing the File Manager and deleting your site files efficiently.
Access File Manager
First, you need to access the File Manager in your HostGator cPanel. Follow these steps:
- Log in to your HostGator cPanel account.
- In the Files section, click on File Manager.
- A new window will open showing your website’s files and directories.
Delete Site Files
Now, you can delete your WordPress site files:
- In the File Manager, navigate to the public_html directory.
- Select all the files and folders related to your WordPress site.
- Click on the Delete button at the top of the File Manager.
- A confirmation dialog will appear. Click Confirm to permanently delete the files.
Ensure you have a backup before deleting anything. This is important in case you need to restore your site.
Removing Databases
Deleting your WordPress site on HostGator involves removing databases. This step ensures that all your data is completely erased. Follow these instructions carefully to avoid any issues.
Open Mysql Databases
First, access your HostGator cPanel. Look for the Databases section. Click on MySQL Databases. This will open a page listing all your databases.
| Step | Action |
|---|---|
| 1 | Login to HostGator cPanel |
| 2 | Navigate to Databases Section |
| 3 | Click on MySQL Databases |
Delete Associated Databases
Find the database linked to your WordPress site. Click the Delete button next to it. A confirmation prompt will appear.
- Locate your WordPress database.
- Click Delete next to it.
- Confirm the deletion in the prompt.
Deleting the database will erase all site data. Ensure you have backups if needed. This step is irreversible.
Finalizing Deletion
Deleting a WordPress site on HostGator is a multi-step process. After the main steps, you must finalize the deletion. This ensures no residual files or data remain. This section guides you through these final steps.
Clear Browser Cache
Clearing your browser cache is essential after deletion. This step ensures you are not viewing cached versions of your site.
- Open your browser settings.
- Find the Clear browsing data option.
- Select the time range, ideally All time.
- Check the boxes for Cached images and files.
- Click Clear data.
Clearing the cache helps in viewing the updated status. It ensures that your site is truly deleted.
Verify Deletion
After clearing the cache, you must verify the deletion. This step confirms that your WordPress site is no longer accessible.
- Open a new browser window.
- Enter your site’s URL.
- Check if the site loads.
- If it does not load, the deletion is successful.
For further confirmation, log in to your HostGator account. Navigate to the File Manager and verify that the site files are gone. This ensures complete deletion.

Credit: m.youtube.com
Frequently Asked Questions
How Do I Delete A WordPress Website On Hostgator?
Log in to your HostGator account. Go to the cPanel. Select “File Manager” and delete your WordPress files. Navigate to “MySQL Databases” and remove your database.
How Do I Delete An Entire WordPress Site?
To delete an entire WordPress site, log in to your hosting account. Find the website management section. Select the WordPress site you wish to delete. Click on “Delete” or “Remove. ” Confirm the deletion to permanently remove your site.
How Do I Completely Delete A WordPress Website From Cpanel?
To completely delete a WordPress website from cPanel, first, log into cPanel. Then, navigate to File Manager and delete the website’s files. Next, go to MySQL Databases and delete the relevant database. Finally, remove any associated subdomains or add-on domains.
How Do I Delete My WordPress Org Site?
To delete your WordPress. org site, log in, go to Tools > Delete Site, and follow the instructions. Ensure backups are made.
How Do I Delete My WordPress Site?
Log in to HostGator, access cPanel, navigate to File Manager, and delete your WordPress site files.
Conclusion
Deleting your WordPress site on HostGator is straightforward. Follow the steps carefully to ensure a smooth process. Always back up your site before deletion. This guide simplifies the task, ensuring you avoid any complications. Feel confident in managing your site with ease.
Thanks for reading and good luck!

