
To increase the maximum upload size in cPanel, navigate to the “MultiPHP INI Editor” and adjust the “upload_max_filesize” value. Save the changes to apply the new limit.
Increasing the maximum upload size in cPanel is essential for handling larger files. Websites often need to accommodate large media files, plugins, or backups. A higher upload limit ensures smooth uploads without encountering frustrating errors. CPanel offers a straightforward way to modify this setting, allowing users to tailor their server configuration to their specific needs.
By adjusting the “upload_max_filesize” in the MultiPHP INI Editor, users can easily increase the upload limit. This flexibility ensures that websites can manage extensive data efficiently, enhancing user experience and operational efficiency.
Prerequisites
Before increasing the maximum upload size in cPanel, certain prerequisites must be met. This ensures a smooth process without any hitches.
Access To Cpanel
You must have access to cPanel to make these changes. Here are the steps to access cPanel:
- Log in to your hosting provider’s website.
- Navigate to the cPanel section.
- Click on the cPanel link to enter the dashboard.
Ensure you have the correct login credentials. This includes your username and password. Without these, you cannot proceed.
Necessary Permissions
Having the necessary permissions is crucial for modifying settings. You need admin rights to alter the upload size limit. Check with your hosting provider if you have limited permissions.
Verify the following:
- Admin privileges in your cPanel account
- Access to the PHP Configuration Editor
- Permissions to modify php.ini or .htaccess files
If you lack these permissions, contact your hosting provider for assistance. Ensure you have everything ready before proceeding.
Locating Php Settings
To increase the maximum upload size in cPanel, you first need to locate the PHP settings. This task is straightforward and can be done within the cPanel interface. Follow these steps to adjust your PHP settings effectively.
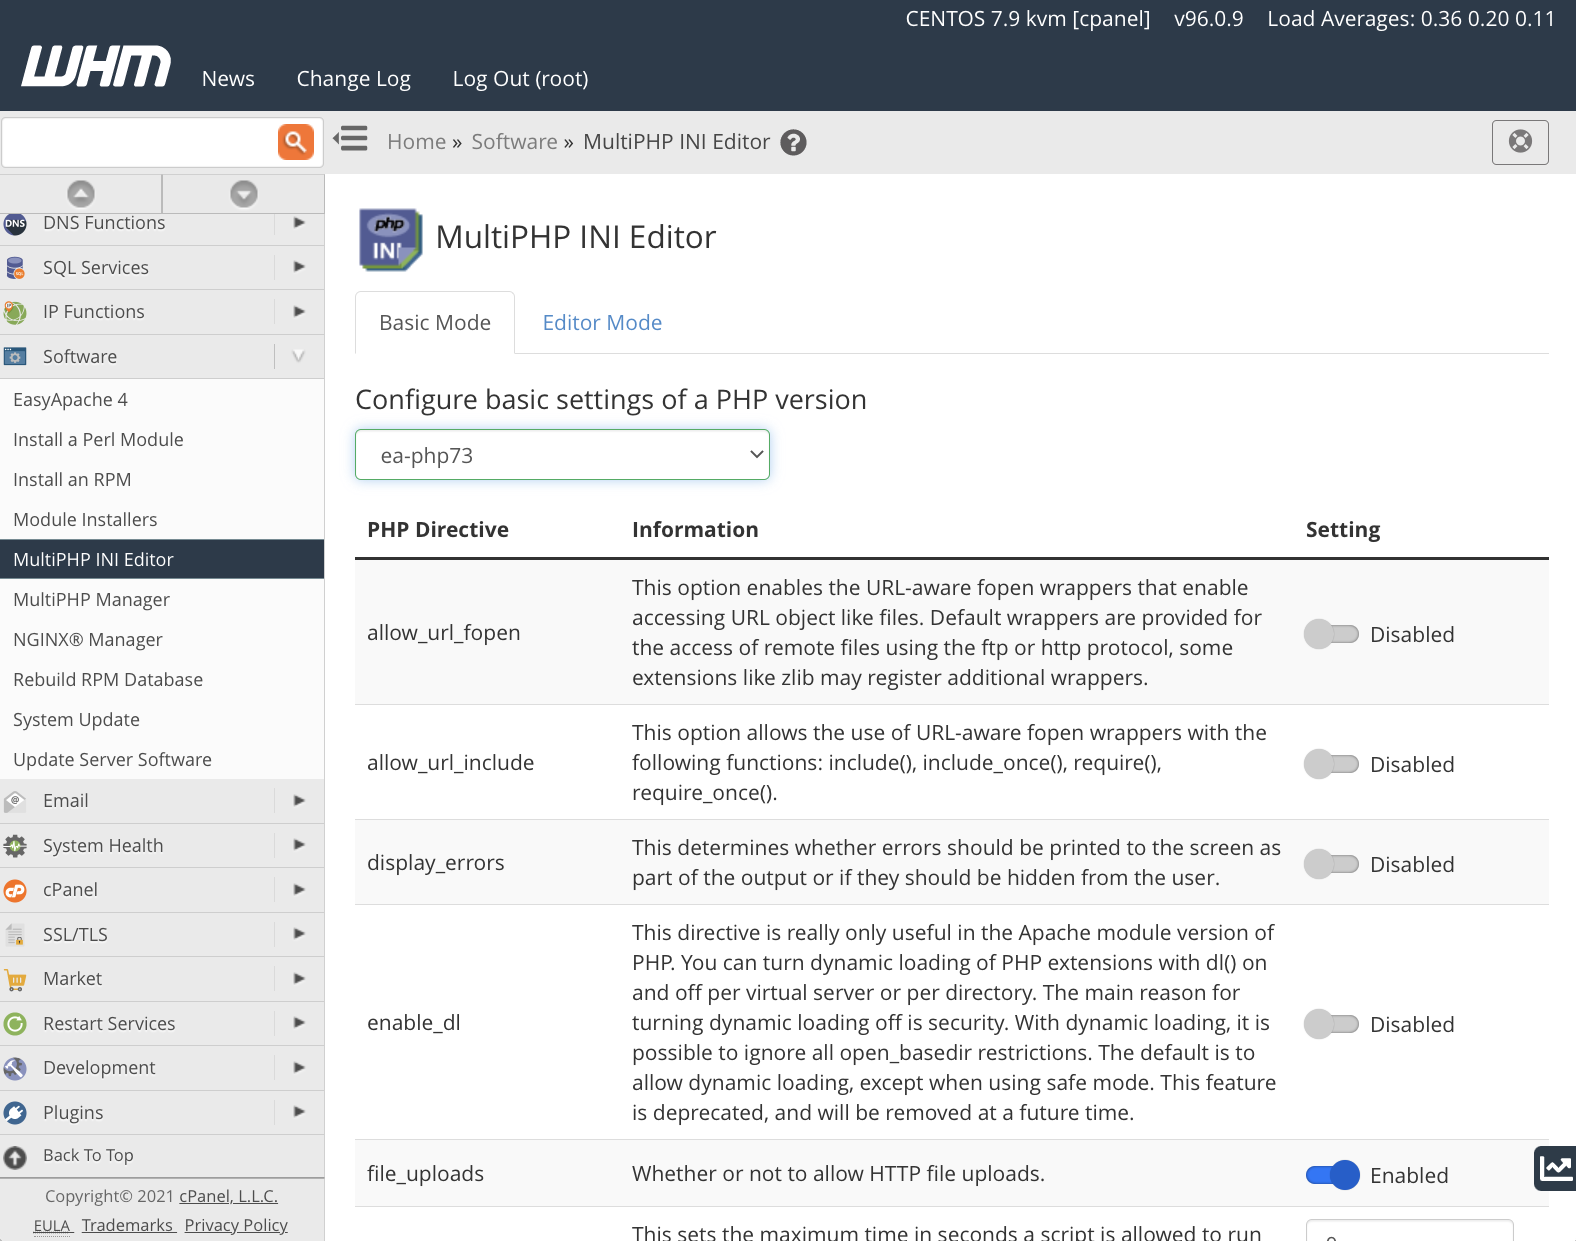
Navigating To Multiphp Ini Editor
Begin by logging into your cPanel account. Once logged in, scroll down to the Software section. Here, you will see the MultiPHP INI Editor option. Click on it to proceed.
The MultiPHP INI Editor allows you to modify PHP configurations. It’s a powerful tool for managing your PHP settings.
Finding The Right Domain
After entering the MultiPHP INI Editor, you will need to select the domain you want to configure. Use the dropdown menu to choose your domain. This step ensures that any changes apply to the correct website.
Once your domain is selected, you will see a list of PHP directives. These directives control various aspects of PHP behavior, including upload limits.
Locate the upload_max_filesize directive. This setting controls the maximum size of an uploaded file. Change the value to your desired maximum upload size. For example, set it to 64M for a 64MB limit.
| Directive | Default Value | New Value |
|---|---|---|
| upload_max_filesize | 2M | 64M |
| post_max_size | 8M | 64M |
Make sure to also adjust the post_max_size directive. This setting should be equal to or larger than the upload_max_filesize.
Once you have updated these settings, click Apply to save your changes. Your maximum upload size is now increased!
Modifying Upload Max Filesize
Modifying the Upload Max Filesize setting in cPanel is crucial for many users. This change allows for larger file uploads, which is essential for websites with heavy content needs. Follow the steps below to adjust this setting efficiently.
Adjusting The Value
To modify the upload max filesize, follow these steps:
- Log in to your cPanel account.
- Navigate to the Software section.
- Click on MultiPHP INI Editor.
- Select the domain you want to modify from the drop-down menu.
- Scroll down to find the
upload_max_filesizedirective. - Change the value to your desired upload limit (e.g., 64M).
Saving Changes
Once you’ve adjusted the value, you need to save the changes:
- Scroll to the bottom of the page.
- Click on the Apply button.
- Check if the changes are saved by uploading a large file.
These simple steps will help you increase the maximum upload size in cPanel. Always double-check the new settings to ensure they are applied correctly.
Credit: cpanel.net
Changing Post Max Size
Increasing the maximum upload size in cPanel is crucial for many users. This ensures you can upload larger files without any issues. One important setting to adjust is the Post Max Size. Follow the steps below to change it effectively.
Setting The Post Max Size
To start, log in to your cPanel account. Navigate to the Software section and click on MultiPHP INI Editor.
Once there, select the home directory or a specific domain. Look for the post_max_size directive. This setting controls the maximum size of POST data, which includes file uploads.
Change the value of post_max_size to your desired limit. For example, if you need a 128MB limit, set it as post_max_size = 128M.
Saving The Configuration
After updating the post_max_size directive, scroll down to the bottom of the page. Click on the Save button to apply the changes.
It’s important to verify the changes. Go back to the main cPanel page and navigate to PHP Info under the Software section. Search for post_max_size to confirm the new value is updated.
If the changes are not reflected, try restarting your web server. This helps in applying the new configurations properly.
| Step | Description |
|---|---|
| 1 | Log in to cPanel |
| 2 | Navigate to MultiPHP INI Editor |
| 3 | Select directory or domain |
| 4 | Find and update post_max_size |
| 5 | Save the configuration |
| 6 | Verify changes in PHP Info |
| 7 | Restart web server if needed |
Tweaking Memory Limit
Tweaking the memory limit in cPanel can help improve your site’s performance. This action can also increase the maximum upload size. Let’s dive into the steps to increase the memory limit and ensure stability.
Increasing Memory Limit
To increase the memory limit, follow these steps:
- Log in to cPanel: Access your cPanel dashboard using your login credentials.
- Open the ‘Select PHP Version’: Find this option under the ‘Software’ section.
- Click on ‘Switch to PHP Options’: This will display various PHP settings.
- Locate ‘memory_limit’: Adjust the value to your desired limit, such as 256M or 512M.
- Save Changes: Click on ‘Save’ to apply the new memory limit.
Increasing the memory limit helps handle larger uploads. It also prevents memory exhaustion errors.
Ensuring Stability
While increasing memory limits, it’s crucial to ensure system stability. Here are some tips:
- Monitor Server Performance: Check server load and memory usage regularly.
- Incremental Changes: Increase the memory limit gradually. Avoid drastic jumps.
- Use Reliable Plugins: Some plugins can cause high memory usage. Choose optimized plugins.
- Regular Backups: Always have recent backups. This helps you revert changes if needed.
Following these tips ensures your site remains stable. It also maintains optimal performance.
Here’s a quick summary in a table format:
| Step | Action |
|---|---|
| 1 | Log in to cPanel |
| 2 | Open ‘Select PHP Version’ |
| 3 | Switch to PHP Options |
| 4 | Locate ‘memory_limit’ |
| 5 | Adjust and Save Changes |
Verifying Changes
After increasing the maximum upload size in cPanel, you must verify the changes. This step ensures the new settings are applied correctly. Follow these steps to confirm the adjustments.
Testing The New Limits
To test the new upload limits, follow these instructions:
- Log in to your WordPress dashboard.
- Navigate to Media > Add New.
- Attempt to upload a file that exceeds the previous limit but is within the new limit.
- If the upload is successful, the changes are verified.
Troubleshooting Common Issues
If the upload fails, consider the following troubleshooting tips:
- Check the php.ini file for correct settings. Ensure upload_max_filesize and post_max_size are updated.
- Review the .htaccess file for correct directives. Ensure the php_value settings match the new limits.
- Restart the web server to apply changes. Use
service apache2 restartorservice httpd restartbased on your server.
If issues persist, consider increasing the limits further or contacting your hosting provider.
Frequently Asked Questions
How To Increase Upload Size Limit In Cpanel?
To increase upload size in cPanel, edit the “php. ini” file. Change “upload_max_filesize” and “post_max_size” values. Save and restart.
How Do I Upload Large Files To Cpanel?
To upload large files to cPanel, use the File Manager or FTP client. For FTP, use software like FileZilla. Ensure your server’s maximum upload size limit is set correctly.
How To Fix The Upload_max_filesize Error In WordPress Cpanel?
To fix the upload_max_filesize error in WordPress cPanel, access the cPanel dashboard. Click on “Select PHP Version,” then “Switch to PHP Options. ” Increase the “upload_max_filesize” value. Save changes and refresh your WordPress site.
How Do I Change My Maximum Upload Size?
To change your maximum upload size, edit the `php. ini` file. Adjust `upload_max_filesize` and `post_max_size` values. Save and restart your server.
How To Find Current Upload Size In Cpanel?
Check your current upload limit in cPanel via the PHP Info page or PHP Configuration settings.
Conclusion
Increasing your maximum upload size in cPanel is essential for managing larger files. By following these steps, you can easily adjust your settings and improve your site’s functionality. Make sure to regularly check your upload limits to ensure optimal performance. Stay updated with cPanel features for a seamless experience.

